
Kia Ora, we are a collaborative Year 4-6 team at Wesley Primary School, NZ. Our teachers are Whaea Sam, Catherine, Whaea Ocea & Mr Toóala.
Thursday, March 17, 2022
Thursday, March 10, 2022
How a compass works
Did you know a compass uses magnetism to show you which way is north and south? We used a needle, magnet, sponge, cork, and a tray of water to test it. We had to rub the magnet onto the needle so it could be magnetized because it will help us know where North is. When we put the needle into the water to float some of our needles sunk and some floated.
When we magnetized the needle it pointed North towards O'Donnell Avenue. Some did not work and were not able to show us where North was because we couldn't get the needle through the cork. Sometimes the sponge got soaked and sunk.
The reason why we conducted this experiment is because we are going to camp in a couple of weeks and we will need to know where to go if we get lost or lost in the bush!
Here is our instructions if you want to try it:
Build a compass
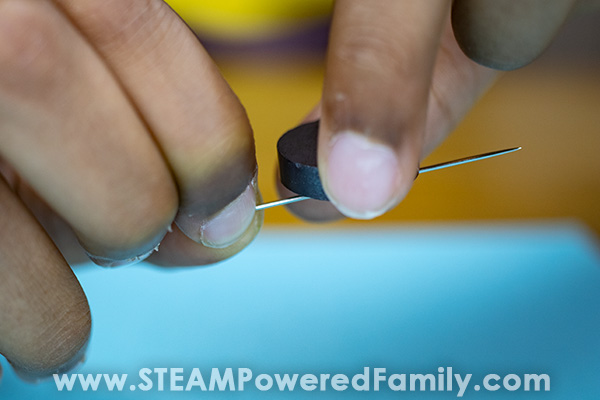
Magnetize the needle
Hold the needle, and take your magnet and stroke it down the length of your needle 50 times. If you are using a weaker magnet you may need to do this more than 50 times. But for most good quality magnets 50 should be about right.Magnetize the other end with the reverse
Now this is very important, take note of which side of the magnet you were using. Flip the needle around so you are holding the other end, and flip over the magnet so you are using the other side of the magnet. Now repeat on the non-magnetized end of of the needle.Prepare the cork
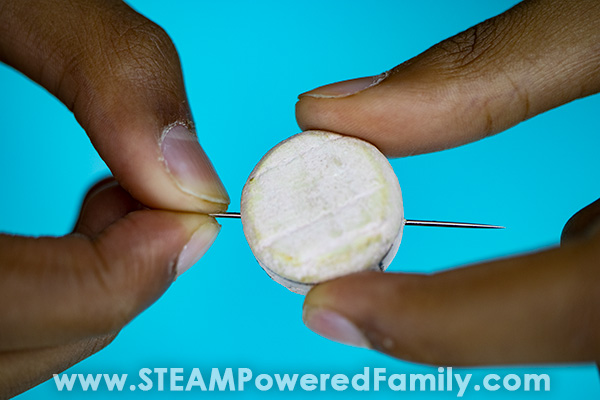
Cut a cork so it is about 1 to 2 cm thick.Insert the needle
Carefully push the needle through the cork. This is best done by an adult with a pair of pliers. I found it easiest if I used a thumb tack to start the hole, then pushed the needle through. You want the cork to be centered on the needle.Fill a bowl with water
Set out your bowl and fill it with a few inches of water.Test the compass!
Place your cork and needle in the water and see how it moves. It should align itself so it points North.Extra fun!
Create a second compass and add it to the same bowl of water. What happens? What happens if you bring your magnet near the water? What happens if you spin the compass?
Thursday, March 3, 2022
Sunday, February 27, 2022
Tuesday, February 22, 2022
Buoyant or Negative Buoyancy?
Buoyant or Negative Buoyant?
Yesterday we made hypotheses about what items might sink or float. If an item floats it is buoyant. We found that items with heavy weights were negatively buoyant.
However, we tested Coca-cola and diet Coca-cola. They had the same amount of liquid and weight. The Coca-cola sank but the diet coca cola was buoyant. This is because the Coca-cola was more dense (contains more sugar and chemical materials).
What we noticed about the maths block was it was buoyant because it is made of wood. Different types of wood can be more dense than other types of wood.
We concluded that the surface area of an object can affect how well it stays buoyant.
Friday, February 18, 2022
Tuesday, February 15, 2022
Raft Building Experiment

Thursday, February 10, 2022
Subscribe to:
Posts (Atom)